Need Some Help ?
Find Your Answers Here!
Installation & Customization
Follow these simple step-by-step guides to customize and install your accessibility widget.
Step 1: Customization (optional)
Your widget can be installed as-is, but if you would like to customize it to best match your brand and website you can follow the customization instructions below to adjust the look of your widget. If you don’t want to customize your widget, skip to Step 2.
All customizations will be made by adjusting the below script (what you will be installing on your website). Copy the code and paste it into your notes or a clean text document to make the next customizations.
<script> (function(){ var s = document.createElement('script'); var h = document.querySelector('head') || document.body; s.src = 'https://acsbapp.com/apps/app/dist/js/app.js'; s.async = true; s.onload = function(){ acsbJS.init({ statementLink : '', footerHtml : '<a target="_blank" href="https://heyjib.ai">Powered By Jib. | Learn More', hideMobile : false, hideTrigger : false, disableBgProcess : false, language : 'en', position : 'right', leadColor : '#708d81', triggerColor : '#708d81', triggerRadius : '50%', triggerPositionX : 'right', triggerPositionY : 'bottom', triggerIcon : 'people', triggerSize : 'medium', triggerOffsetX : 20, triggerOffsetY : 20, mobile : { triggerSize : 'small', triggerPositionX : 'right', triggerPositionY : 'bottom', triggerOffsetX : 10, triggerOffsetY : 0, triggerRadius : '50%' } }); }; h.appendChild(s); })(); </script>
Color Customizations
There are two colors you can set for your widget, one for the icon color, and one for the interface color.
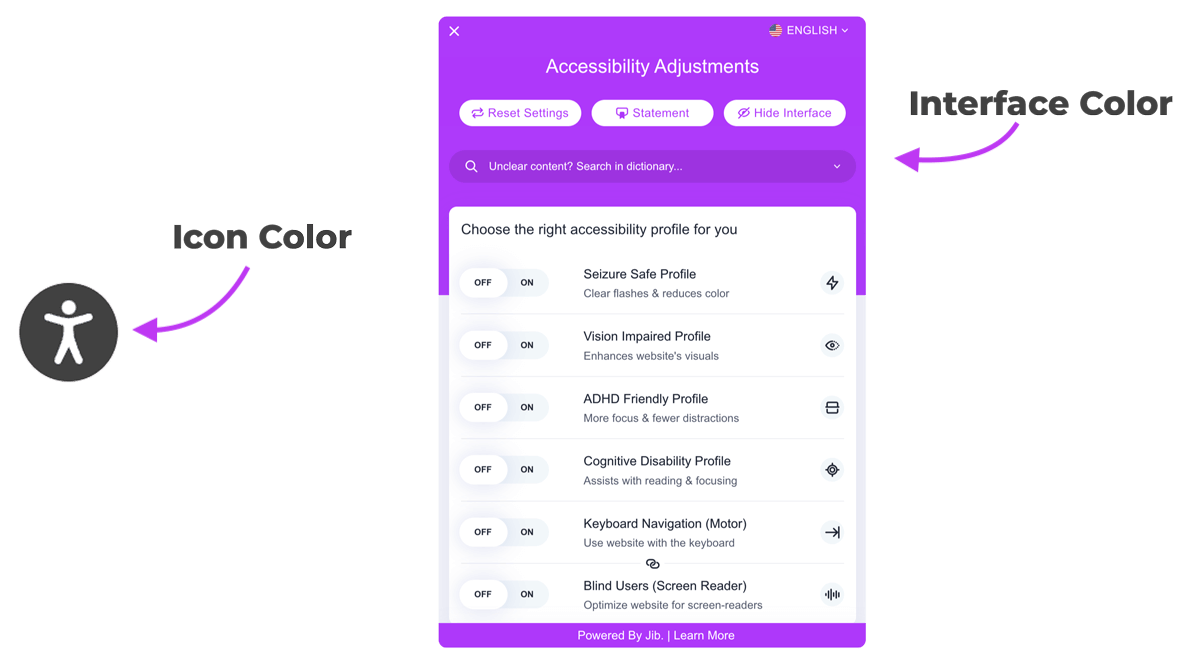
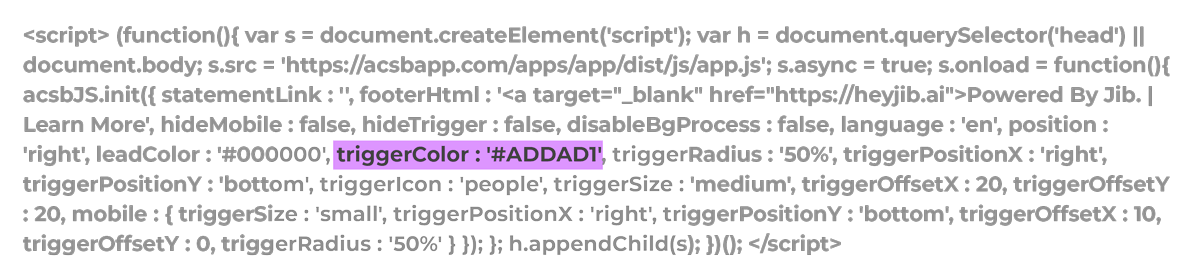
Let’s adjust the icon color first. Within the above script you copied, find the element triggerColor : ‘#ADDAD1’. Remove “ADDAD1” and replace with your desired hex color code (maintaining the # and surrounding ‘ ‘ ).

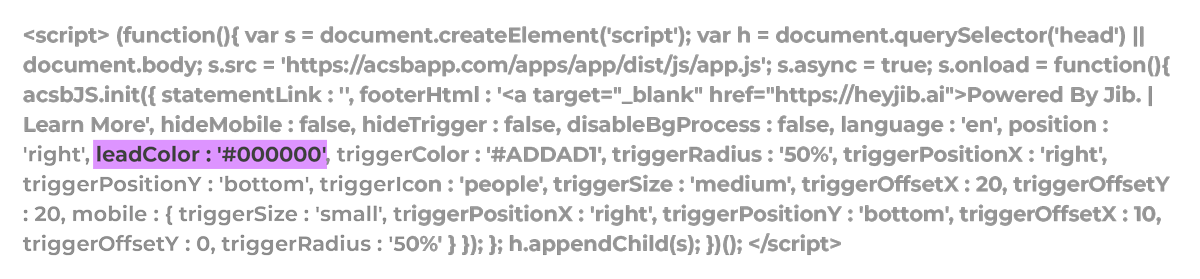
Great! Now let’s adjust the interface color. Find the element leadColor : ‘#000000’. Remove “000000” and replace with your desired hex color code (maintaining the # and surrounding ‘ ‘ ).

You have finished your widget’s customization and are ready to move to Step 2: Installation.
If you are looking for advanced customizations such as widget placement, offset sizing, etc., you can find them expanded below.
Step 2: Installation
Now you are ready to install!
Utilizing your customized script from Step 1 or the uncustomized script below, paste the script within the body tag of your HTML (it doesn’t matter whether it’s in the opening or closing of the tag). You can also install the script within your head tag, though within the body is more recommended.
Alternatively, if you would like to install it in Google Tag Manager, you can follow the step-by-step directions here.
<script> (function(){ var s = document.createElement('script'); var h = document.querySelector('head') || document.body; s.src = 'https://acsbapp.com/apps/app/dist/js/app.js'; s.async = true; s.onload = function(){ acsbJS.init({ statementLink : '', footerHtml : '<a target="_blank" href="https://heyjib.ai">Powered By Jib. | Learn More', hideMobile : false, hideTrigger : false, disableBgProcess : false, language : 'en', position : 'right', leadColor : '#708d81', triggerColor : '#708d81', triggerRadius : '50%', triggerPositionX : 'right', triggerPositionY : 'bottom', triggerIcon : 'people', triggerSize : 'medium', triggerOffsetX : 20, triggerOffsetY : 20, mobile : { triggerSize : 'small', triggerPositionX : 'right', triggerPositionY : 'bottom', triggerOffsetX : 10, triggerOffsetY : 0, triggerRadius : '50%' } }); }; h.appendChild(s); })(); </script>
Step 3: Testing
After the script is correctly installed, you will immediately see the icon and interface on your website. The AI then takes up to 48 hours to scan and analyze your website and once finished, your website is compliant. The AI re-scans for new and revised content to process every 24 hours.
If you have any questions or need any additional support please visit our online support.
Thank you for joining us in trying to make the web a more accessible place!
Find Out Now If Your Website Is WCAG & ADA Compliant
